Buffalo development with Docker
Table of Contents
What is Buffalo? #
Buffalo is a Rails-inspired framework for web development in Go programming language. It provides many different tools and generators that help you start working on your business logic ASAP, rather than searching for a suitable package to set up a web server eventually. Buffalo is called to make the cold world of Go development, where you’ll hear “just use the standard library” every time, more friendly for fresh “gophers”, who want to dive into the world of web development with Go.
At the same time, Buffalo rather should be considered as a good base for a side project. It contains a lot of elements that experienced developers could find redundant due to the common approach to Go programming that provides lightness and simplicity.
Why do you need this guide? #
Even though Buffalo eliminates most of the headaches caused by the development environment setup, developing an app running in a Docker container can be tricky for freshly arrived Go developers. In addition, so far the community is relatively small, and it could be difficult to find a well-grounded tutorial for basic things.
In this article, we will discuss how to:
- Dockerize Buffalo project
- debug Buffalo project running in Docker container using Delve (both CLI and UI)
Prerequisite #
Assume you successfully generated a Buffalo project using the command:
buffalo new <project-name>
At this moment, you already can run your project in development mode using the command:
buffalo dev
However, at the same time, you won’t be able to see your home page so far. The error that appears tells us, that we don’t have a database yet. Of course, we could create it immediately using Buffalo CLI, but since we are pretty self-confident, we’ll create it directly in the container after Dockerization!
By default, Buffalo uses the Postgres database, so let’s use an out-of-the-box config in our demo project.
Dockerization #
Setting up Dockerfile #
Any dockerization process starts with creating your project’s image using Dockerfile. Buffalo has Dockerfile out of the box; this is the first thing that can confuse developers who work with Buffalo for the first time and make dockerization process more complicated. The main mistake is that Dockerfile that goes out of the box IS NOT for development. It was created to simplify deployment, and it follows the idea of running your compiled project’s binary file in the crystal-clear Alpine image (without Buffalo or Go installed).
Let’s dive deeper into the default Dockerfile - it is a key to understanding how we can transform it for our needs. So by default you’ll have:
|
|
Consider the sequence of actions briefly:
- Using Buffalo image as a base image (line 3)
- Creating workdir for your project (lines 7 - 8)
- Adding and installing libs for the front-end part of the project (it will be skipped if you generated the project as an API only) (lines 11 - 15)
- Copying go.mod and go.sum files to the workdir (lines 17-18)
- Installing Go dependencies (line 21)
- Adding rest of the files (line 23)
- Building buffalo project (line 24)
- Creating additional clean alpine image (lines 26 - 32)
- Running project binary inside newly created alpine image (line 44)
After such analysis, you’ll possibly already have an imagination of what steps should be performed to use Dockerfile for the development process:
- We need to remove the additional alpine image creation.
- We don’t need to copy the source code inside and pack all the dependencies inside the Docker image for the development environment. We’ll use volumes to mount the directory on our host machine into the container later in docker-compose.
Here is what updated Dockerfile can look like:
# This is a multi-stage Dockerfile and requires >= Docker 17.05
# https://docs.docker.com/engine/userguide/eng-image/multistage-build/
FROM gobuffalo/buffalo:v0.18.14 as builder

ENV GOPROXY http://proxy.golang.org

RUN mkdir -p /src/buffalo_demo
WORKDIR /src/buffalo_demo

# this will install the latest nodejs version
RUN apt-get update && \
    apt-get -y install curl gnupg && \
    curl -sL https://deb.nodesource.com/setup_20.x | bash - && \
    apt-get -y install nodejs

ENV ADDR=0.0.0.0

EXPOSE 3000
There are some issues with Buffalo Docker image:
- As you can notice, in the updated Dcokerfile we installed a newer node version. That’s because the Buffalo image uses deprecated node v12.x and you won’t be able to build your image without node update.
- The Buffalo image uses Go version 1.18. It means that if you use a newer one in your go.mod file - you should change it to 1.18. You can eliminate these issues by writing your own Buffalo image. You can use the source code of the existing image as a reference.
As you can see, we haven’t specified a command to run the code inside the container in the Dockerfile. We’ll do it in the docker-compose file later. Nevertheless, at this moment, you can build your Docker image and run the project inside the container.
To build your Docker image run
docker build -t buffalo-demo --no-cache .
To run the container and enter its bash
docker run -it --name buffalo-demo-1 -p 3000:3000 -v $(pwd):/src/buffalo_demo buffalo-demo /bin/bash
Inside container you can run your Buffalo project
go run ./cmd/app
However, at this stage, we still don’t have a database, so the home page still be unavailable. Before creating DB, you should take into account, that while the project is running in the Docker container, this container - is a localhost for the project. Meaning, that even though you have Postgres installed on your machine, your app can’t access it. To use Postgres from the app’s container, you should run it in a separate container too. It can be accomplished using docker-compose file.
Setting up docker-compose #
Create a docker-compose.yml file in your project’s root directory.
version: "3.8"
services:
  db:
    image: postgres:latest
    ports:
      - 5432:5432
    volumes:
      - db:/var/lib/postgresql/data
  app:
    build: .
    ports:
      - 3000:3000
    depends_on:
      - db
    volumes:
      - .:/src/buffalo_demo
      - go-modules:/go/pkg/mod
    command: go run ./cmd/app

volumes:
  db:
  go-modules:
Here we created two services:
- db for our database container where Postgres will run
- app for our Buffalo project
Let’s dive deeper into the app service we configured:
- the root . directory on your host machine is mounted into the container at /src/buffalo_demo
- the go-modules volume is used to cache the Go modules. It’s mounted at global cache directory /go/pkg/mod
- run the project by the simple command
go run ./cmd/app
The last thing left to do before we can run our containers is to change the host in the project’s database.yml file to db.
development:
  dialect: postgres
  database: buffalo_demo_development
  user: postgres
  password: postgres
  host: db
  pool: 5
Running project #
Now, you can simply run docker compose up to run the project. When the project is up and running, you can proceed to the app container’s bash:
docker exec -it buffalo_demo-app-1 sh
Here, you can create the database using command:
buffalo db create
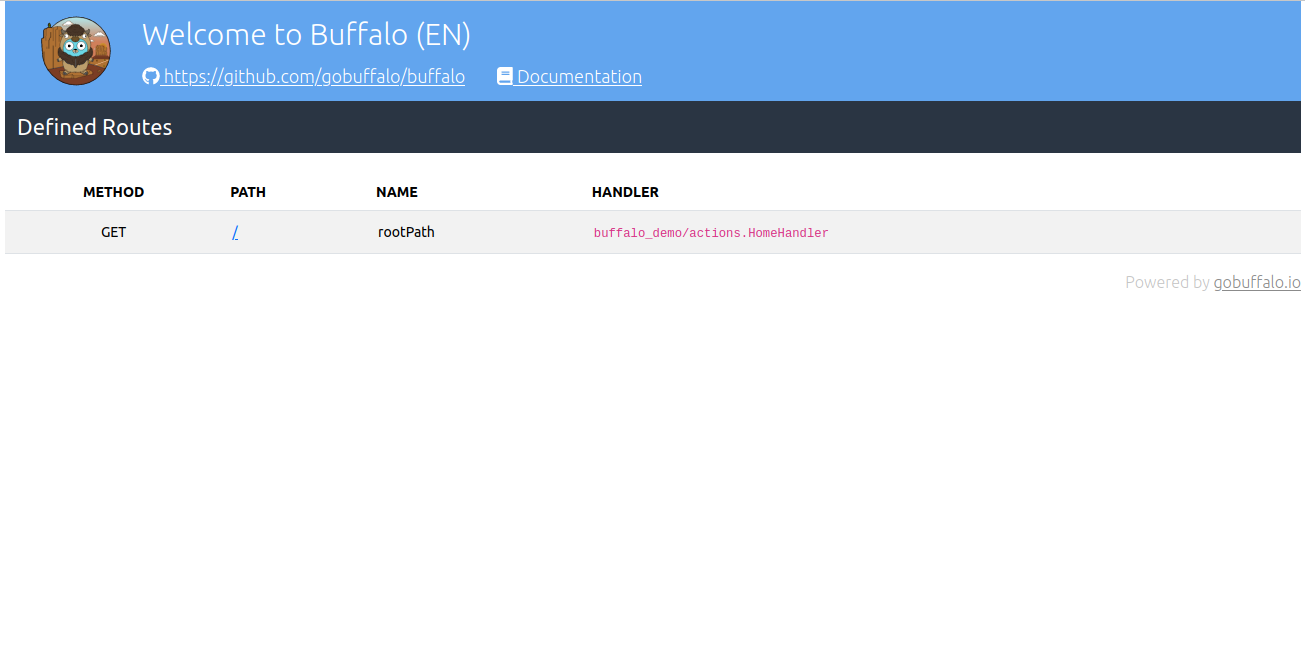
Now, if you try to access the home page, you’ll see it works!
Debugging with Delve in Docker #
Another crucial thing for efficient development is debugging. Fortunately, there is a very powerful debugger built for Go debugging from scratch - Delve. At the same time, the initial Delve setup can be tricky, especially due to the variety of ways to start the go project. Working with Delve inside a Docker container makes it even more complicated. Let’s try to configure Delve and create a configuration to run the project in debug mode.
Delve setup #
First of all, we need to add dlv executable to our app’s container. Put the following line after downloading dependencies in the Dockerfile to install Delve:
RUN go install github.com/go-delve/delve/cmd/dlv@latest
Now, if you try to build and run the project, you will have the opportunity to run dlv CLI command inside the app’s container. But, all of these commands are useless so far =)
According to documentation, while using Delve with Docker, we need to start a headless instance of Delve inside the container
dlv exec --headless --continue --listen :4040 --accept-multiclient /path/to/executable
and then connect to it
dlv connect :4040
As you can see, we need to use the precompiled binary of the project to run it in debug mode. I suggest creating a separate docker-compose.debug.yml file where we’ll override commands to run the project in debug mode and add port 4040.
# docker-compose.debug.yml

version: "3.8"
services:
  app:
    command: >
      bash -c 'go build -gcflags="all=-N -l" -o /bin/app ./cmd/app
      && dlv exec --headless --continue --listen :4040 --accept-multiclient --check-go-version=false /bin/app'
    ports:
      - 3000:3000
      - 4040:4040
    environment:
      - GODEBUG=netdns=go
Note, that we override the command to run the container and set two commands to do it:
go build -gcflags="all=-N -l" -o /bin/app ./cmd/appto compile the project. Here-gcflags="all=-N -l"flag is used to build the binary without optimizationdlv exec --headless --continue --listen :4040 --accept-multiclient --check-go-version=false /bin/appto execute compiled binary in debug mode
Pay attention to two important configuration details:
- Since I use Go version 1.18, I had to set the
--check-go-version=falseflag fordlv execcommand. That’s because my Delve version is newer. - We need to set the environment variable
GODEBUG=netdns=go. This force Go runtime to use pure go DNS resolver instead of using operating system’s API to resolve DNS. Learn more.
Now, you can run the project in debug mode:
docker compose -f docker-compose.yml -f docker-compose.debug.yml up
Using CLI #
While your project is running in debug mode, connect to the app’s container:
docker exec -it buffalo_demo-app-1 sh
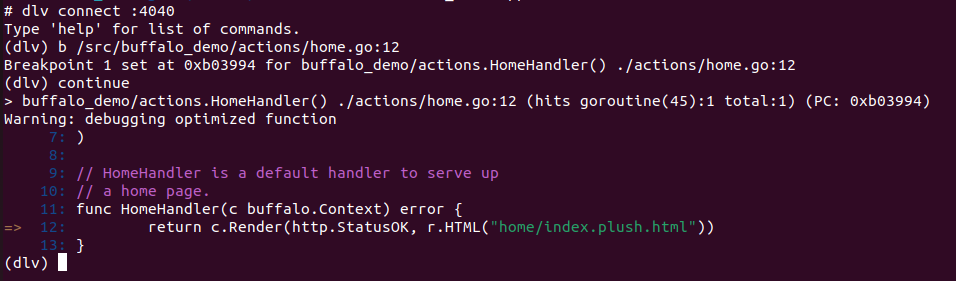
Then, you need to connect to the debug server:
dlv connect :4040
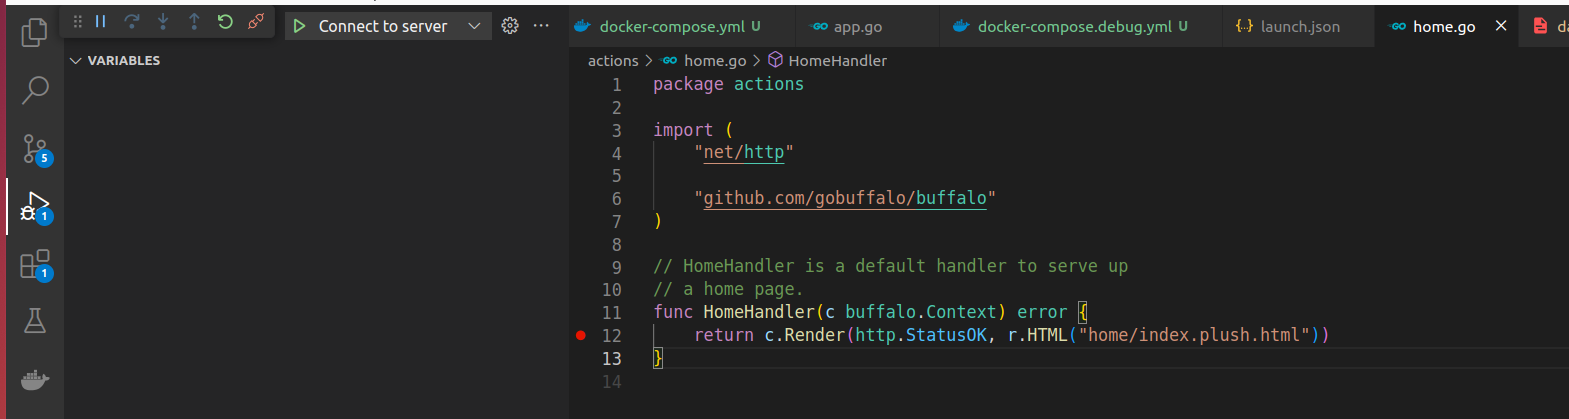
After the connection, you’ll be able to use dlv CLI for debugging. Let’s set the breakpoint on the 12th line of the default HomeHandler:
break /src/buffalo_demo/actions/home.go:12
When the breakpoint is set, try to load the home page again. Execution will be stopped on the breakpoint we set. To see it, run dlv CLI continue command.
Learn more about dlv CLI commands in the official documentation.
Using VS Code UI #
If you use VS Code with the Go extension for development, you have the option to debug the project using VS Code UI. To do it, we need to configure the default Run and Debug functionality. Open Run and Debug window and press create a launch.json file.
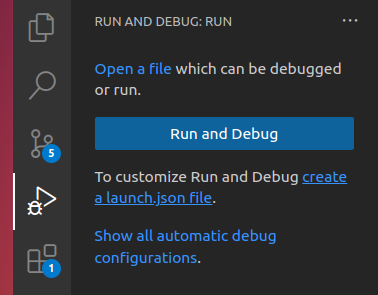
VS Code will guide you through the main configuration settings. In particular, it will ask you about the language to debug and debugging approach. Choose Go -> Go: Connect to server. Such configuration will force VS Code to connect to the headless debug server, as we’ve done through CLI.
Here is my launch.json file.
{
"version": "0.2.0",
"configurations": [
{
"name": "Connect to server",
"type": "go",
"request": "attach",
"mode": "remote",
"port": 4040,
"host": "127.0.0.1"
}
]
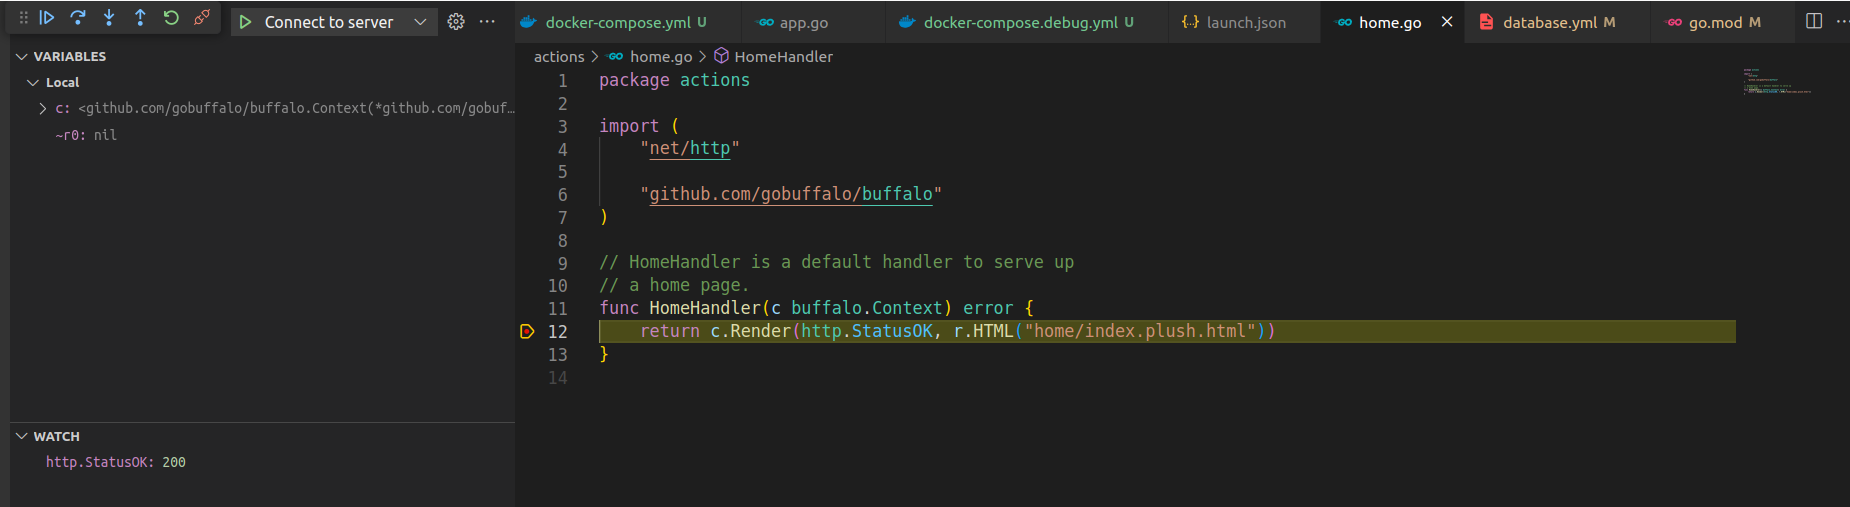
}When your configuration is ready:
- Run the project in debug mode
- Click Connect to server button in VS Code
- Set a breakpoint using UI
- Try to access the home page again
After performing these steps, you’ll be able to debug using VS Code UI.
Summary #
If you are new to Go programming all these exotic configuration details can look pretty complicated, especially if you come from the world of dynamically-typed languages. On the other hand, an additional layer of complexity during setup is a common thing for statically-typed programming languages and usually, it is a reasonable price for lightning fast execution of precompiled binaries.
Talking about the Buffalo framework, even though it doesn’t have a big portfolio of real-world projects, it is still a good choice to dive deeper into Go development. It is a great playground where you can get familiar with many popular packages, and find out how we can use Go with databases, task runners, and more.
We are ready to provide expert's help with your product
or build a new one from scratch for you!