FAQ chatbot in 15 minutes
Table of Contents
Intro #
In this article, we will create a simple FAQ bot. As a demo-project we are going to implement chatbot that will provide hardware device users with support, but the technology we will consider suits for any other business cases as well.
After reading the first chapter, you will be able to create a chatbot on top of Azure Bot Framework and deploy it (I promise you it will be pretty fast).
The second chapter will walk you through the possibilities of Azure Custom Question Answering (CQA) service and how you can use them to make CQA knowledge base suit your business needs.
Chatbot development with the Bot Framework SDK and Custom Question Answering #
Creating chatbot with the Bot Framework SDK #
Creation steps are well described in the official documentation by Microsoft, nevertheless, I will briefly walk you through them here as well.
Open a terminal, navigate to the directory where you want your bot to be created, and run the following commands:
- To install Yeoman generator, run:
npm install -g yo - To install bot generator:
npm install -g generator-botbuilder - To generate a project, run Then enter the necessary info about your bot
yo botbuilder
? What's the name of your bot? my-chat-bot
? What will your bot do? Demonstrate the core capabilities of the Microsoft Bot Framework
? What programming language do you want to use? JavaScript
? Which template would you like to start with? Echo Bot - https://aka.ms/bot-template-echo
? Looking good.  Shall I go ahead and create your new bot? Yes
I recommend starting with the Echo Bot template: it generates all files we need for development, and it is easy to get familiar with.
Once your bot is generated, navigate to the directory with a name you entered as a bot name.
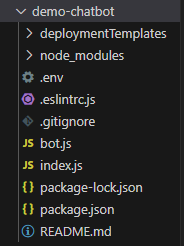
If you are using node version higher than v17.9.1, ensure that the version of the restify package in the generated project is higher than 10 else you can encounter problems starting your bot.
In the demo project, we are using 11.1.0 restify version.
To start your bot, run the following commands:
npm installnpm start
Once your bot is started, you’ll see the message:
restify listening to http://[::]:3978
Get Bot Framework Emulator: https://aka.ms/botframework-emulator
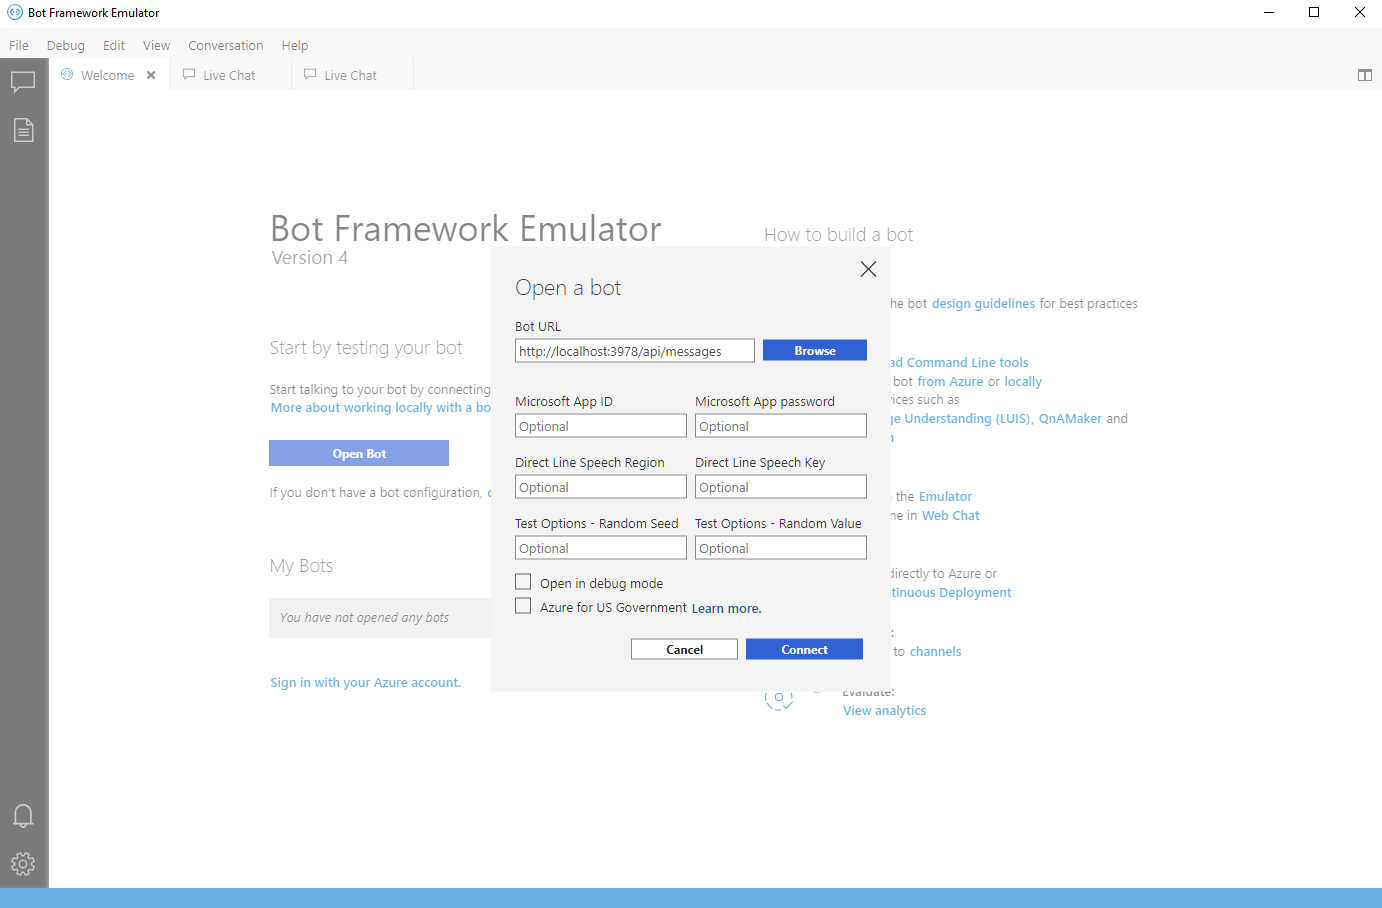
To talk to your bot, open the emulator select "Open Bot"
Now you can test it. Install a Bot Framework Emulator and open your bot there.

Creating Custom Question Answering (CQA) project #
Preparing infrastructure #
To create a CQA projec, you need to prepare infrastructure for it first. Since CQA is an Azure service, you have to do it on the Azure Portal.
You will need:
- Azure Subscription
- Resource Group for your Language Service
- Language Service
Creating Project in Language Studio #
Language Studio - is a special tool for working with Azure Cognitive Services. Once the infrastructure is ready, go to the Language Studio and create a CQA project using steps below:
- Login to your account (the same as for Azure) and choose Language Service you created on the Azure Portal.
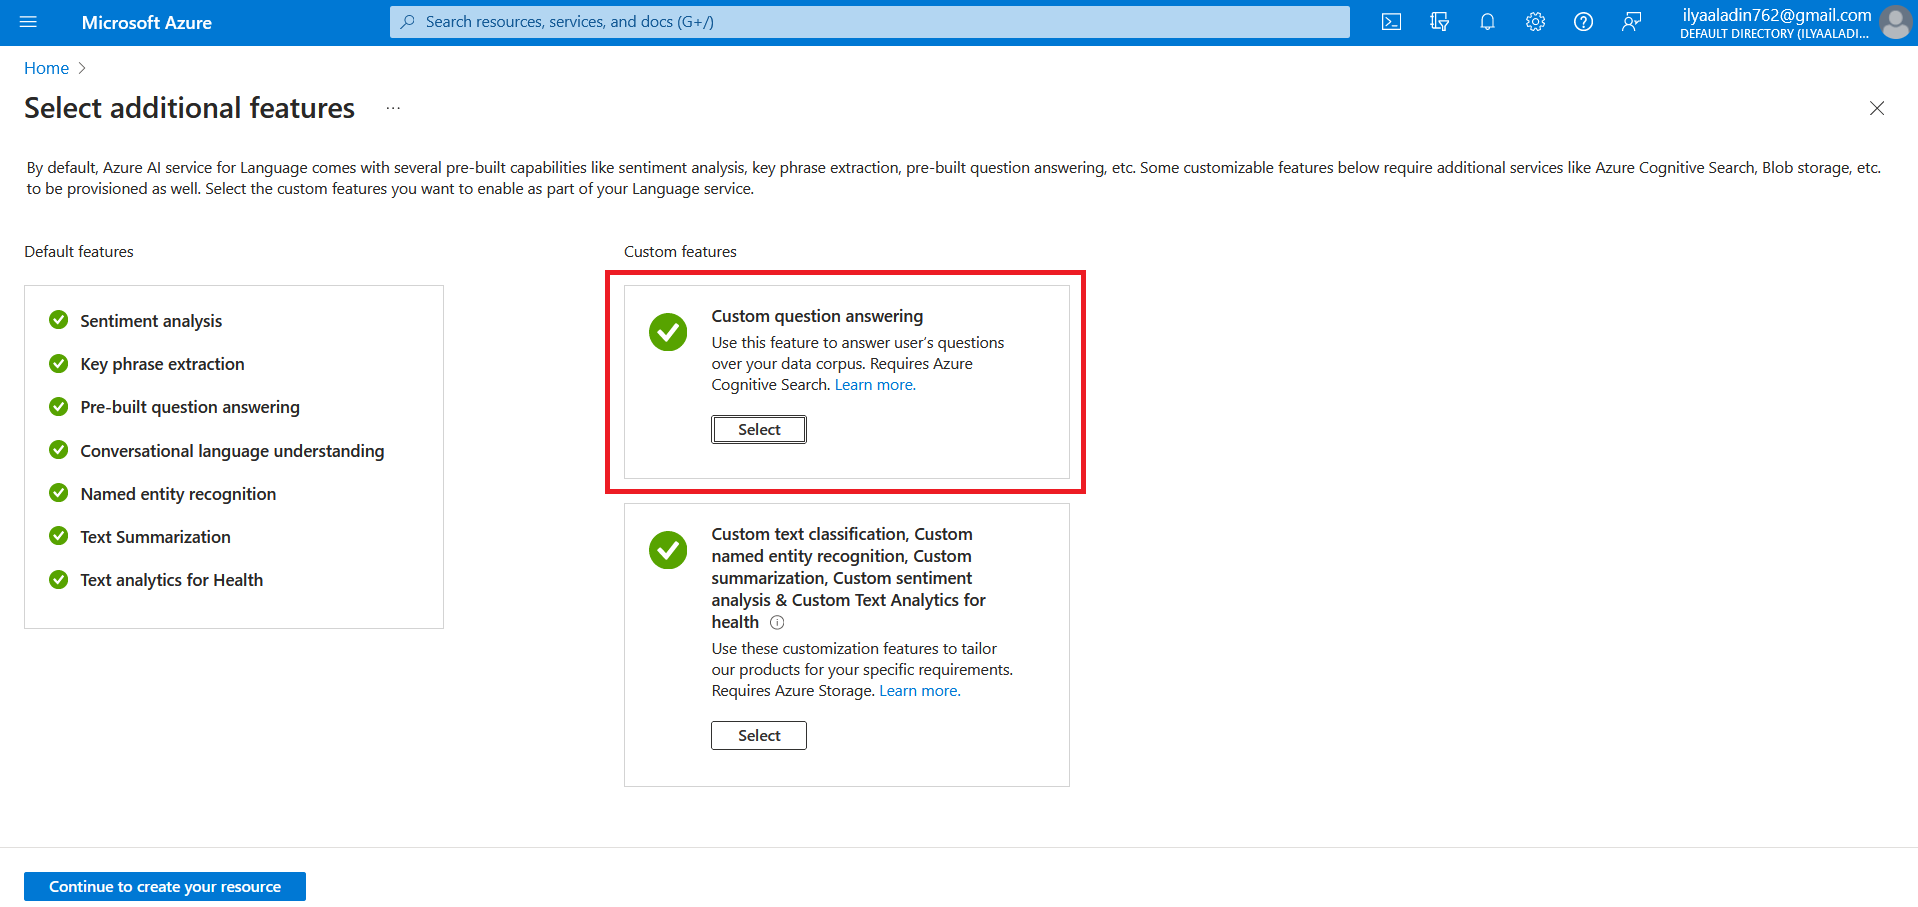
- Press Create new button and choose Custom question answering.
- Fill out the project creation form.
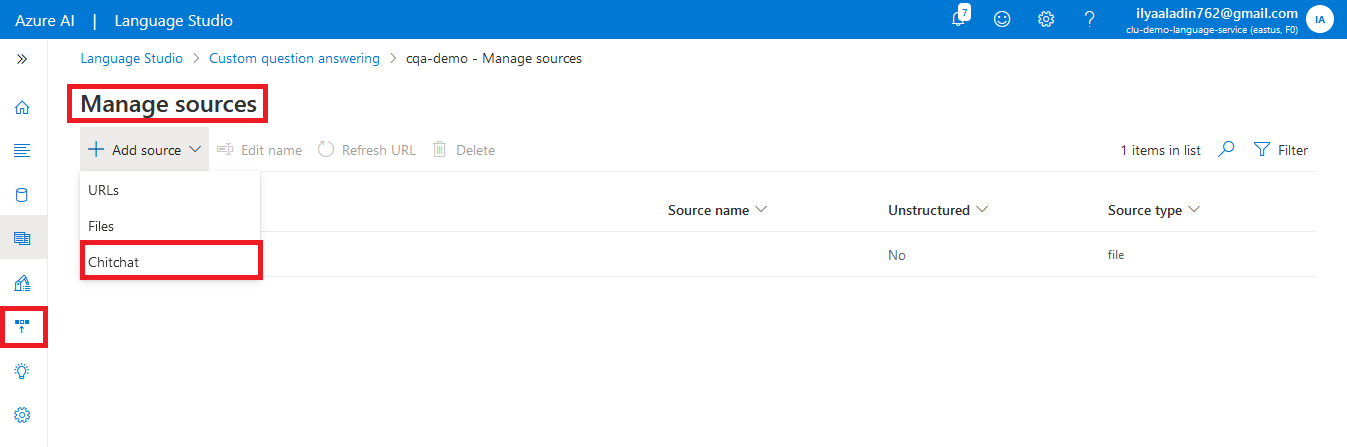
Once the project created, you will be redirected to its Manage sources page.
Click Add source and choose Chitchat. Chitchat - is a set of the basic questions and answers, that makes your bot more conversational and engaging.
After chitchat is added, proceed to the Deploy knowledge base tab.
On the Deploy knowledge base tab press Deploy. When deployment is finished, we can connect the chatbot to the CQA project.
Connecting the chatbot to the CQA project #
Set environment variables #
To the .env file of your chatbot project, add the following environment variables:
ProjectName=
LanguageEndpointKey=
LanguageEndpointHostname=
- ProjectName is name of the CQA project you created in the Language Studio
- LanguageEndpointKey and LanguageEndpointHostname you can find on the Keys and Endpoint tab of the Language Service you created on the Azure Portal.
Set up and call the knowledge base client #
Add botbuilder-ai package to your project. Simply run:
npm install --save botbuilder-aiNavigate to the index.js file in the root directory of your project. To create the knowledge base client follow the steps:
-
Import
CustomQuestionAnsweringclass to the index.jsconst { CustomQuestionAnswering } = require('botbuilder-ai'); -
Create an instance of the
CustomQuestionAnsweringclass in the index.js (knowledge base client)const qnaMaker = new CustomQuestionAnswering({ knowledgeBaseId: process.env.ProjectName, endpointKey: process.env.LanguageEndpointKey, host: process.env.LanguageEndpointHostName }); -
Find where the instance of your bot class is created, and send knowledge base client to the constructor as an argument
const myBot = new EchoBot(qnaMaker);
Navigate to the bot.js file in the root directory of your project.
Add a parameter qnaMaker to the class constructor and use it to create qnaMaker instance property
this.qnaMaker = qnaMaker;Inside the class constructor, you’ll find two activity handlers:
- onMessage: handles the messages users send
- onMembersAdded: handles the initial event of joining the conversation with a bot
Since CQA provides answers to the user’s messages, we are interested in the onMessage activity handler. There, we have to replace code that simply sends the user’s message back with code that will call the knowledge base client.
// code to remove

const replyText = `Echo: ${ context.activity.text }`;
await context.sendActivity(MessageFactory.text(replyText, replyText));
// code to add
const response = await this.qnaMaker.getAnswers(context); // context object contains a message sent by the user
await context.sendActivity(this.getTopAnswer(response));Since the getAnswers() method returns the array of the results from the knowledge base, I added one more method to the class getTopAnswer()
getTopAnswer(response) {
    return response[0].answer;
}
Here is how my bot class looks like:
const { ActivityHandler, MessageFactory } = require('botbuilder');
class EchoBot extends ActivityHandler {
constructor(qnaMaker) {
super();
this.qnaMaker = qnaMaker;
this.onMessage(async (context, next) => {
const response = await this.qnaMaker.getAnswers(context);
await context.sendActivity(this.getTopAnswer(response));
// By calling next() you ensure that the next BotHandler is run.
await next();
});
this.onMembersAdded(async (context, next) => {
const membersAdded = context.activity.membersAdded;
const welcomeText = 'Hello and welcome!';
for (let cnt = 0; cnt < membersAdded.length; ++cnt) {
if (membersAdded[cnt].id !== context.activity.recipient.id) {
await context.sendActivity(MessageFactory.text(welcomeText, welcomeText));
}
}
// By calling next() you ensure that the next BotHandler is run.
await next();
});
}
getTopAnswer(response) {
return response[0].answer;
}
}
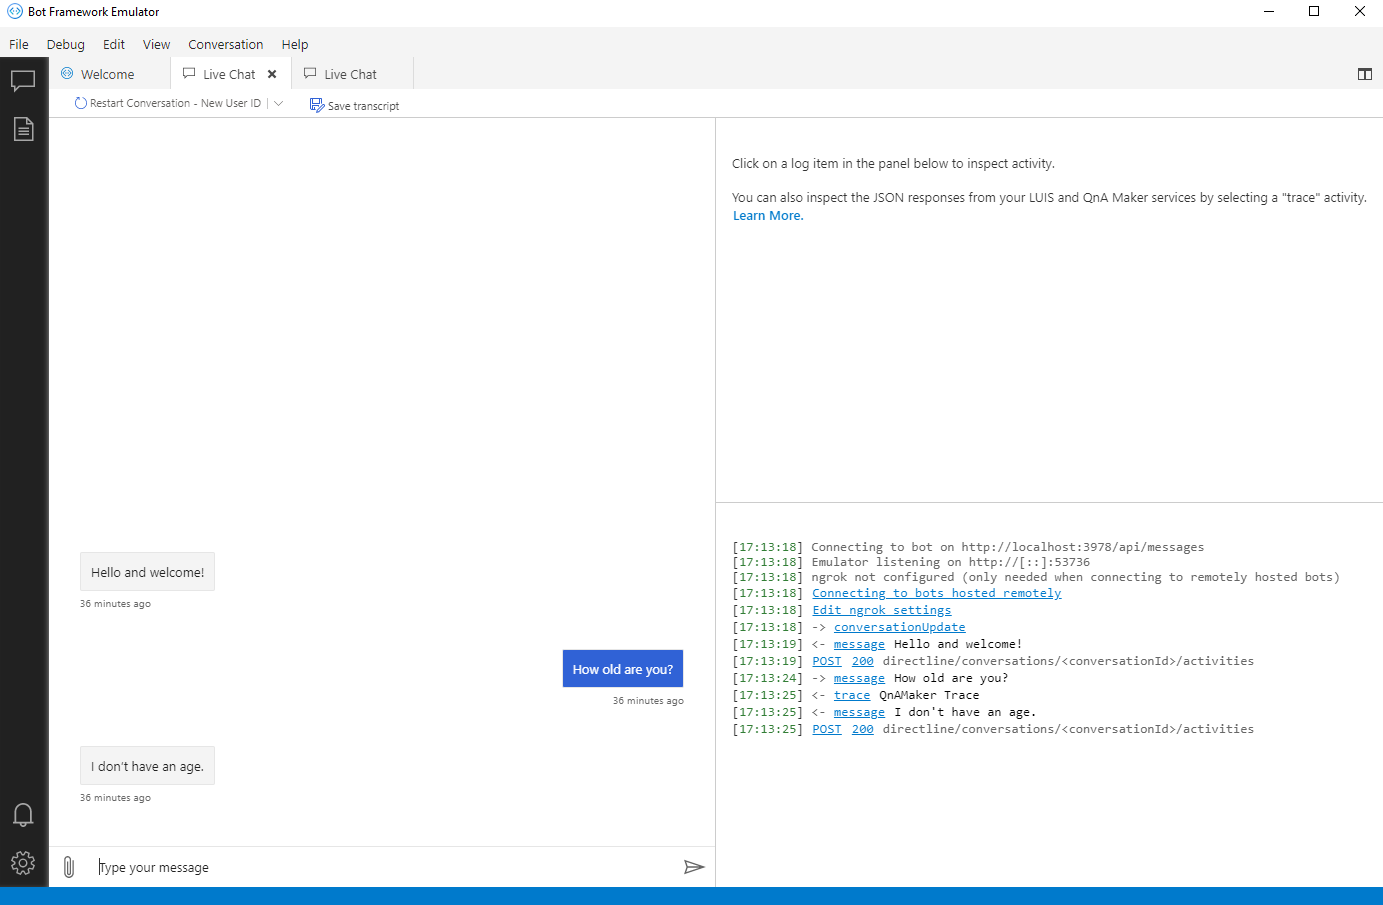
module.exports.EchoBot = EchoBot;Now, you can start your bot and test how it gets answers from the CQA in the Bot Framework Emulator.
Here is the whole project source code.
Chatbot deployment #
You can learn how to deploy your bot through official documentation, but I’ll walk you through the necessary steps here too.
- Install an Azure CLI
- Login to the Azure CLI using
az login
In the command output, double-check the name of an Azure Subscription. If you need to use another one, run:
az account set --subscription "<subscription name you need>"- Since we are going to use User-assigned managed identity for our deployment, we need to create it first. Run:
az identity create --resource-group "<group>" --name "<identity>"
- resource-group. The name of the resource group in which to create the identity. Use the resource group where the language service is created.
- name. The name of the identity resource to create.
Pay attention for the command output. Record values you’ll need in later steps:
- The resource group name for the identity resource
- The name of the identity resource
- The clientId from the command output
- We need to create an App Service, to which our chatbot will be deployed. Let’s use ARM (Azure Resource Manager) template for this.
From your project root directory, navigate to deploymentTemplates/deployUseExistResourceGroup/parameters-for-template-BotApp-with-rg.json. You should fill this file with the necessary data for your App Service. As a reference, you can use template-BotApp-with-rg.json file in the same directory.
Here is my App Service config file:
{
  "$schema": "https://schema.management.azure.com/schemas/2019-04-01/deploymentParameters.json#",
  "contentVersion": "1.0.0.0",
  "parameters": {
    "appServiceName": {
      "value": "faq-bot-app"
    },
    "existingAppServicePlanName": {
      "value": ""
    },
    "existingAppServicePlanLocation": {
      "value": ""
    },
    "newAppServicePlanName": {
      "value": "faq-bot-app-plan"
    },
    "newAppServicePlanLocation": {
      "value": "East US"
    },
    "newAppServicePlanSku": {
      "value": {
        "name": "F1",
        "tier": "Free",
        "size": "F1",
        "family": "F",
        "capacity": 1
      }
    },
    "appType": {
      "value": "UserAssignedMSI"
    },
    "appId": {
      "value": "<ClientID of the identity I created>"
    },
    "appSecret": {
      "value": ""
    },
    "UMSIName": {
      "value": "<Name of the identity I created>"
    },
    "UMSIResourceGroupName": {
      "value": "<Name of the Resource Group where CQA is configured>"
    },
    "tenantId": {
      "value": "<TenantID of the identity I created>"
    }
  }
}- For the User-assigned managed identity app type, we should leave appSecret field blank
- For the new App Service Plan, we should leave existingAppServicePlanName and existingAppServicePlanLocation blank.
To create App Service for your bot, run:
az deployment group create --resource-group "<resource-group>" --template-file "<template-file-path>" --parameters "<parameters-file-path>"- resource-group. Name of the Azure resource group in which to create the app service.
- template-file. The path to the ARM template for the app service. The path can be relative or absolute.
- parameters. The path to the parameters file to use with the ARM template. The path can be relative or absolute.
Now, if you check your Resource Group on Azure Portal, you’ll see that the App Service you configured has been added to it.
- Then we need to create Azure Bot resource. We’ll use the same pattern as with an App Service.
From your project root directory, navigate to deploymentTemplates/deployUseExistResourceGroup/parameters-for-template-AzureBot-with-rg.json. You should fill this file with the necessary data for your App Service. As a reference, you can use template-AzureBot-with-rg.json file in the same directory.
Here is my Azure Bot config file:
{
  "$schema": "https://schema.management.azure.com/schemas/2019-04-01/deploymentParameters.json#",
  "contentVersion": "1.0.0.0",
  "parameters": {
    "azureBotId": {
      "value": "my-faq-chatbot"
    },
    "azureBotSku": {
      "value": "F0"
    },
    "azureBotRegion": {
      "value": "global"
    },
    "botEndpoint": {
      "value": "https://faq-bot-app.azurewebsites.net/api/messages"
    },
    "appType": {
      "value": "UserAssignedMSI"
    },
    "appId": {
      "value": "<ClientID of the identity I created>"
    },
    "UMSIName": {
      "value": "<Name of the identity I created>"
    },
    "UMSIResourceGroupName": {
      "value": "<Name of the Resource Group where CQA is configured>"
    },
    "tenantId": {
      "value": "<TenantID of the identity I created>"
    }
  }
}
To create Azure Bot resource, run:
az deployment group create --resource-group "<resource-group>" --template-file "<template-file-path>" --parameters "<parameters-file-path>"- resource-group. Name of the Azure resource group in which to create the App Service.
- template-file. The path to the ARM template for the App Service. The path can be relative or absolute.
- parameters. The path to the parameters file to use with the ARM template. The path can be relative or absolute.
-
Fill the following environment variables in the .env file:
MicrosoftAppType=UserAssignedMSI MicrosoftAppId=<client ID of the user-assigned managed identity> MicrosoftAppPassword=<Not applicable. Leave this blank for a user-assigned managed identity> MicrosoftAppTenantId=<tenant ID of the user-assigned managed identity> -
To prepare your project to deploy, naviagte to the root directory and run:
az bot prepare-deploy --lang Javascript --code-dir "." -
Within your project’s root folder, create a zip file that contains all files and subfolders.
-
We are finally ready to deploy the bot! Run:
az webapp deployment source config-zip --resource-group "<resource-group-name>" --name "<name-of-app-service>" --src "<project-zip-path>"
- resource-group. The name of the Azure resource group that contains your bot.
- name. Name of the app service you used earlier.
- src. The absolute or relative path to the zipped project file you created.
-
Once your bot is deployed, you need to add environment variables for CQA to the App Service Configuration.
- Open App Service you created for your bot on the Azure Portal
- Navigate to the Configuration tab
- To add one more environment variable, press New application setting. Add the environment variables for CQA that we added to our local .env file.
-
When environment variables updates, you can interact with it on the Azure Portal, integrate it to one of the channels Azure provides by default, or use it as an API for your application.
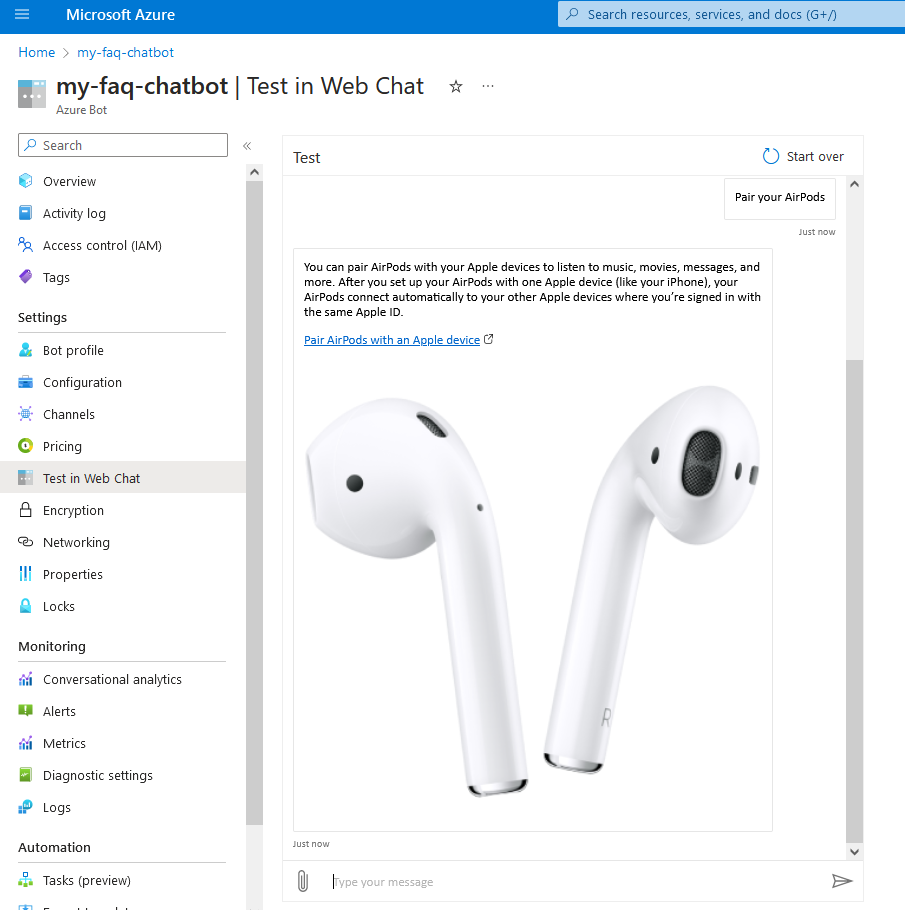
To test bot in Web Chat:
- In your browser, navigate to the Azure portal.
- Go to your bot resource.
- Open the Test in Web Chat pane.
- Interact with your deployed bot.
-
Most likely your bot will not respond instantly. It can take some time to start App Service.
-
If you encounter an error interacting with bot through Web Chat, then check WEBSITE_NODE_DEFAULT_VERSION environment variable in the App Service Configuration. If it’s value ~10 I suggest updating it to a higher version to solve the problem. Even though default project README says that you can use Node.js version 10.14.1 or higher, too old version can cause the issues.

Custom Question Answering for your FAQ chatbot #
Our chatbot is completely ready, only one thing left to do is to make our Custom Question Answering knowledge base suit our business needs. Let’s back to the Language Studio and do it.
There are several ways to add new question and answer pairs to your knowledge base. In this article, we’ll consider two of them:
- manually
- using URL
Expanding knowledge base using URL #
This approach works perfectly if you already have a FAQ web page on your business’ website. For our demo chatbot, I decided to use the URL to the official AirPods User Guide by Apple.
- Navigate to the Manage sources page in the Language Studio
- Press Add source
- Choose URLs

- In the opened window, press Add url
- Enter a source name in the URL name field
- Paste link to your FAQ web page to the URL field
- Leave Classify file structure as Auto-detect
- Click Add all


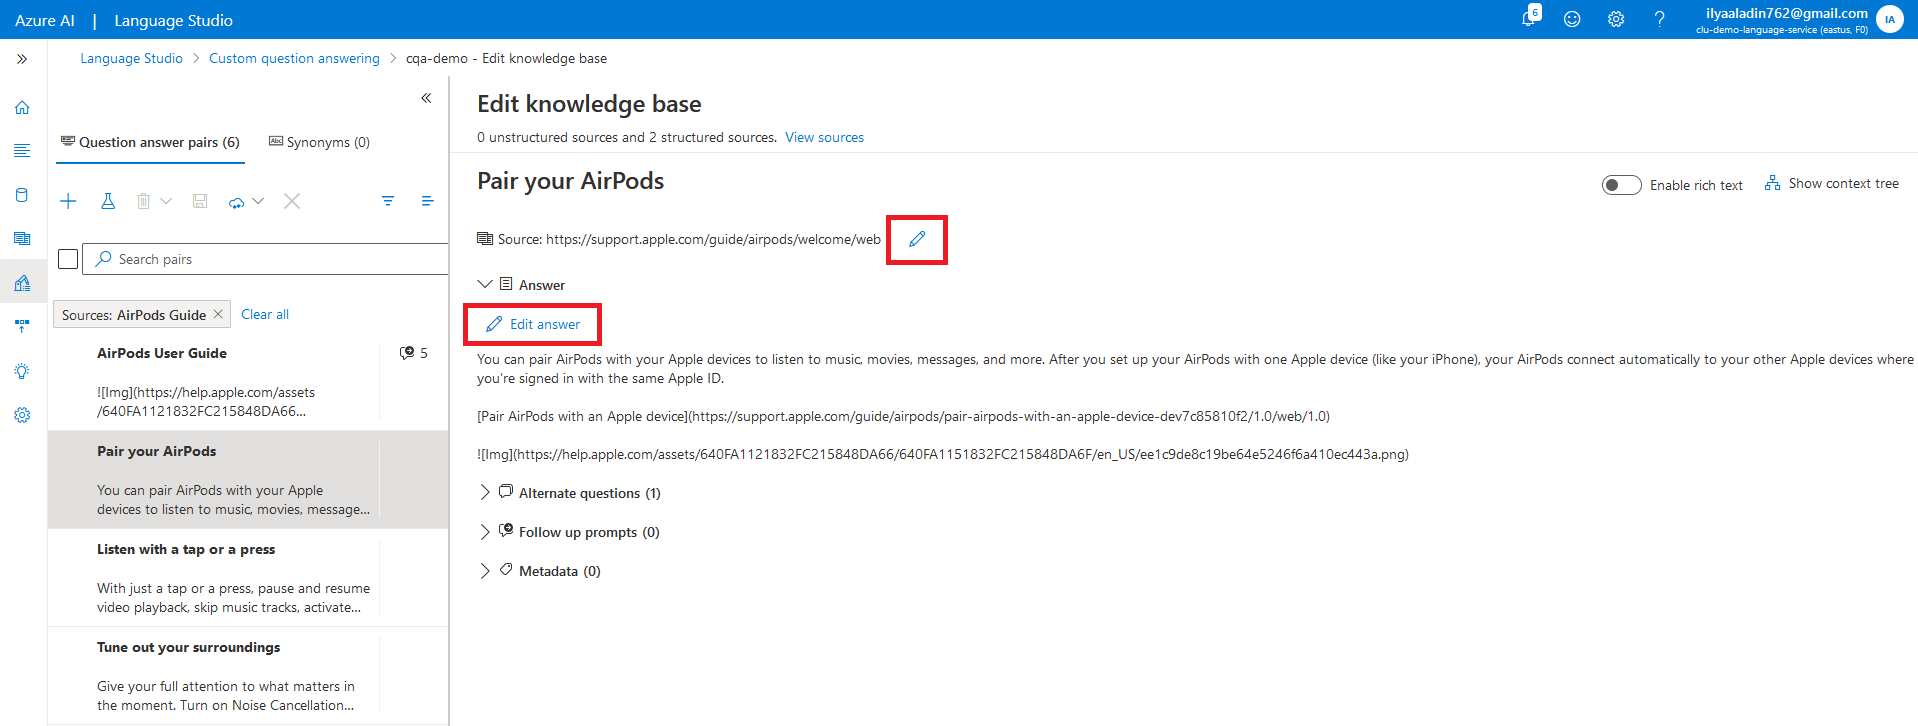
After the data source added successfully, you can open it and check what question-answer pairs were detected. If you noticed an issue in how data were detected, you can simply edit it (both question and answer) right on the page (Edit knowledge base).
Expanding knowledge base manually #
If you would like to edit the knowledge base manually, you can do it on the Edit knowledge base page.
- Press plus button in the top left corner of the page
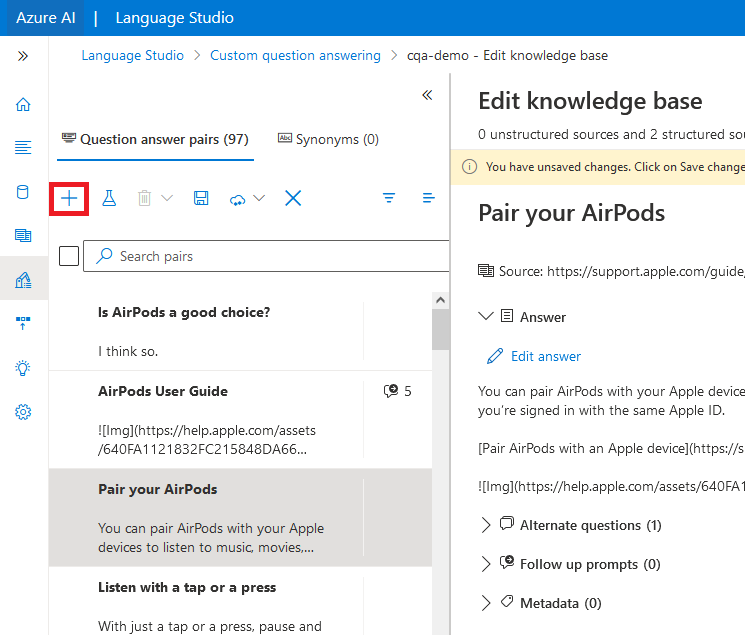
- In the opened window, select source Editorial and enter your question-answer pair
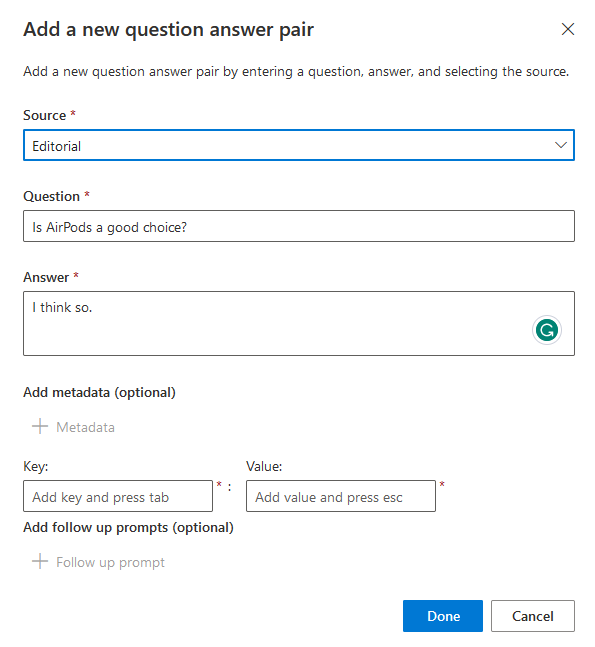
- Click Done and that’s it! You added one more question-answer pair to your knowledge base.
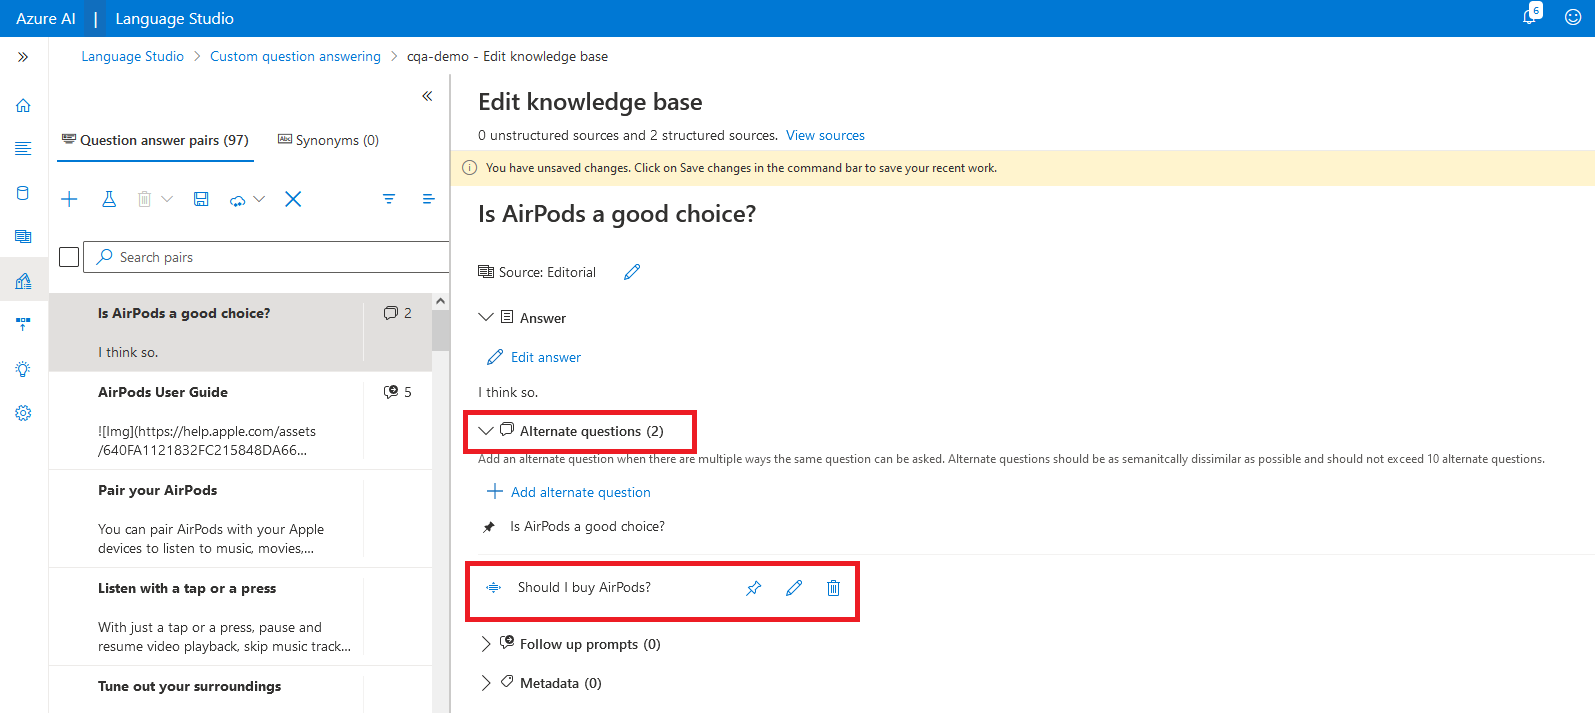
Alternate questions #
Notice, that for each question-answer pair, you can add alternate questions to extend the variety of utterances your bot can handle.
Once you’re finished adding question-answer pairs to the knowledge base, you need to save them and deploy in the same way we discussed above.
Finish! #
Since our chatbot is already connected to the CQA, right after knowledge base deploy, you can test it in a Web Chat on Azure Portal.
Summary #
Following these steps, you can easily create a FAQ-bot using your custom knowledge base. Of course, this article reveals only a small piece of the whole power of both Bot Framework SDK and Custom Question Answering, furthermore, you can add Conversational Language Understanding to your bot to make it even more smart and user-friendly. Nevertheless, this is a good starting point to create a really efficient and helpful chatbot for your business.
We are ready to provide expert's help with your product
or build a new one from scratch for you!