How to add basic GitLab-Jira integration to your project
Table of Contents
The productivity of the team depends on the processes that the team has and the systems that they use. Small automation of some processes can increase the team’s efficiency and save time for some routine tasks.
In this article, we will talk about the Basic GitLab-Jira integration and how to set up it for your team.
So how it works? #
Just a small example.
- In Jira, you have a task with the number “MB-278”
- In GitLab, you create a branch for this task “feature/MB-278”, work in this branch, and make a commit “[MB-278] - fix some issue”. Then you create a Merge Request to the main branch.
And now we have:
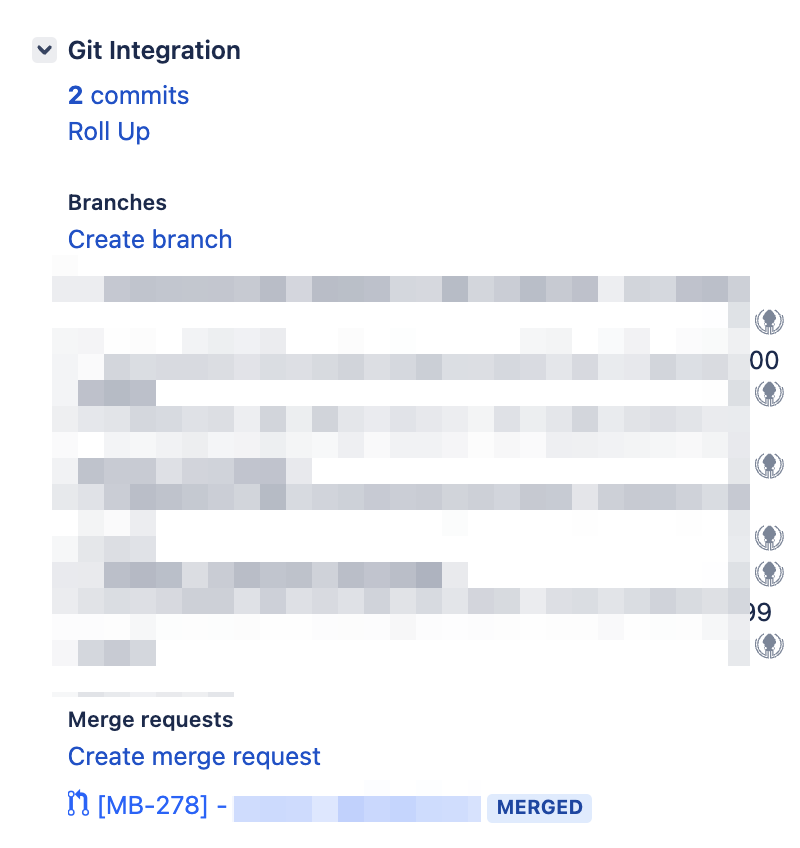
- The “MB-278” text on GitLab is clickable and redirects you to the particular Jira issue.

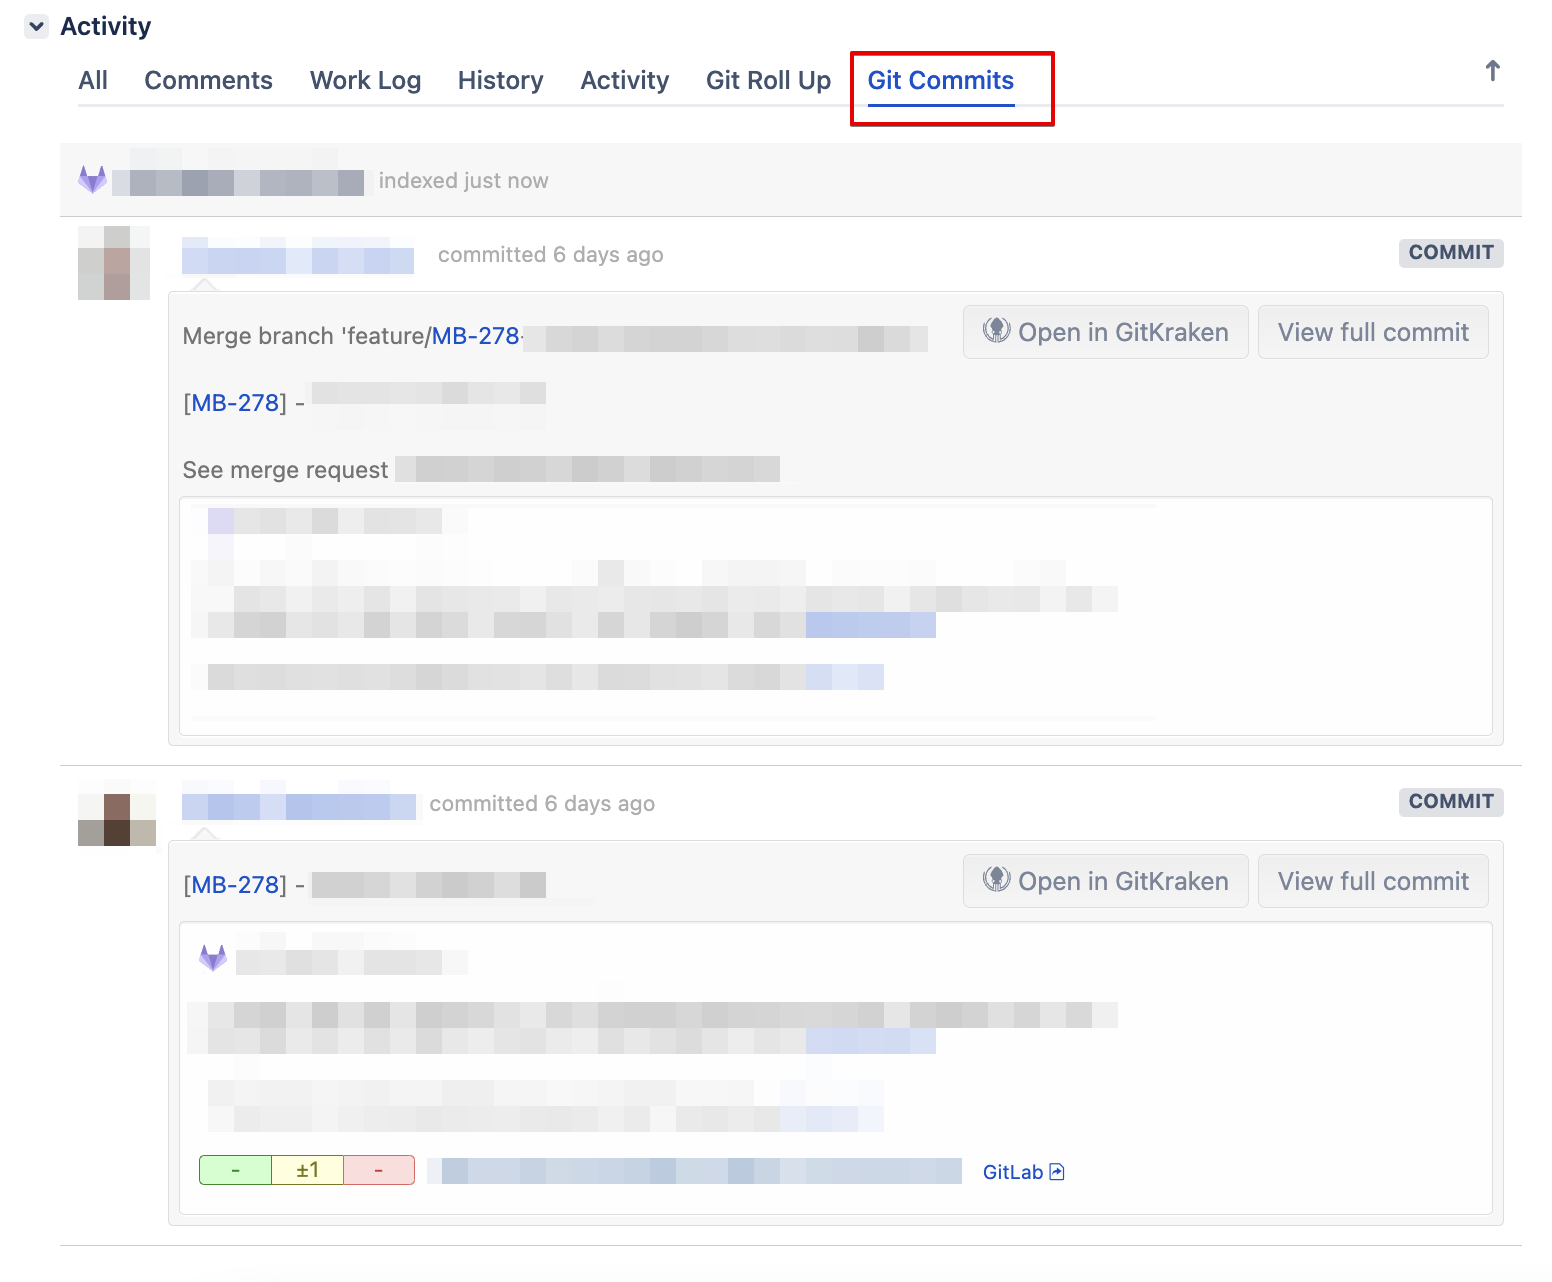
- When you are in Jira on this issue page you can see all the actions in GitLab related to this issue. This information appears in the “Git Integration” section on the right side and in the “Git commits” tab in the “Activity” section.
Why the integration is useful #
This will make the general workflow faster and more comfortable, not only for developers but also for tech leads, project managers, etc.
- When you receive the Merge Request for review you can just click on the issue number and it will redirect you to this issue in Jira, so you know what is this fix about.
- When you review the issues list you can just check the Git Integration section and see that there was some work regarding this issue in code and the MR is merged, so this issue can be tested or etc.
GitLab Integration types #
There are two types of integration: Group-level integration and Project-level integration.
Group-level integration #
This is an integration for all projects in a group that is inherited and used by default. For example, you have Ruby Group and 30 projects inside this group. If you want the integration to be enabled for all these projects - choose the Group-level integration.
Of course, if 2 projects from this group need the custom integration - you can create a Project-level integration for them and the group-level integration will be overridden by the default one.
Project-level integration #
Most likely you already understand what it’s about. This is just an integration for one particular project. This can be useful if you need this integration for one project, and group-level integration is not an option, or when the integration is pretty custom (depending on what you want to achieve) and the default integration is not enough.
Let’s integrate Jira with GitLab #
For both variants of integration, the steps are pretty much the same. In this example, I will go through the process of creating Project-level integration.
Navigate to your repository and go to Settings - Integrations page.
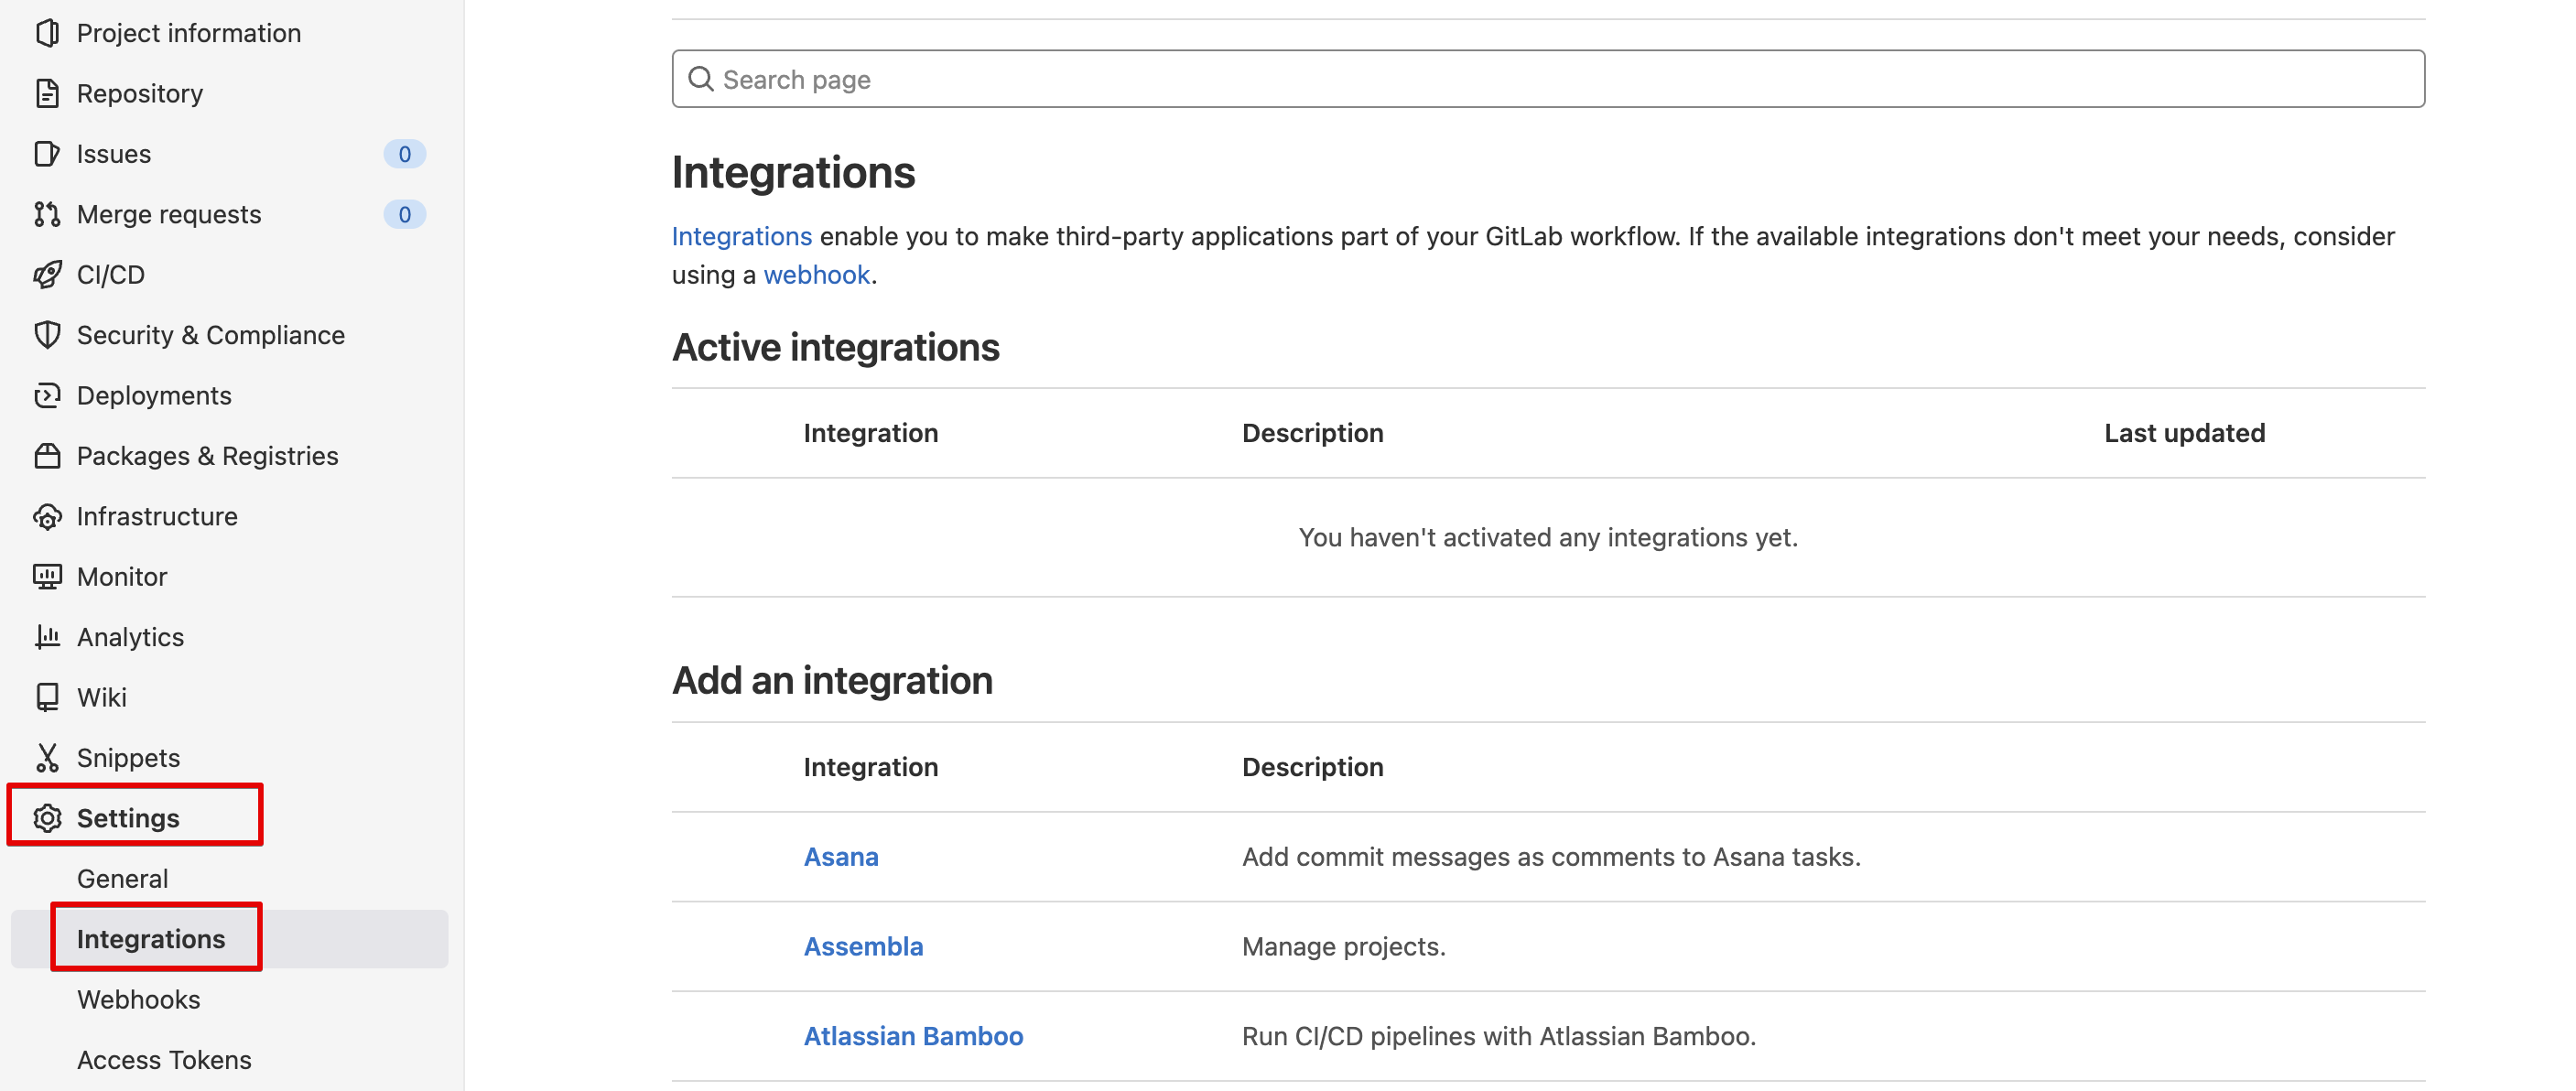
Scroll down and find the Jira option and click on it. The page with connection details and triggers will open. You need to populate some information here.
Connection details information #
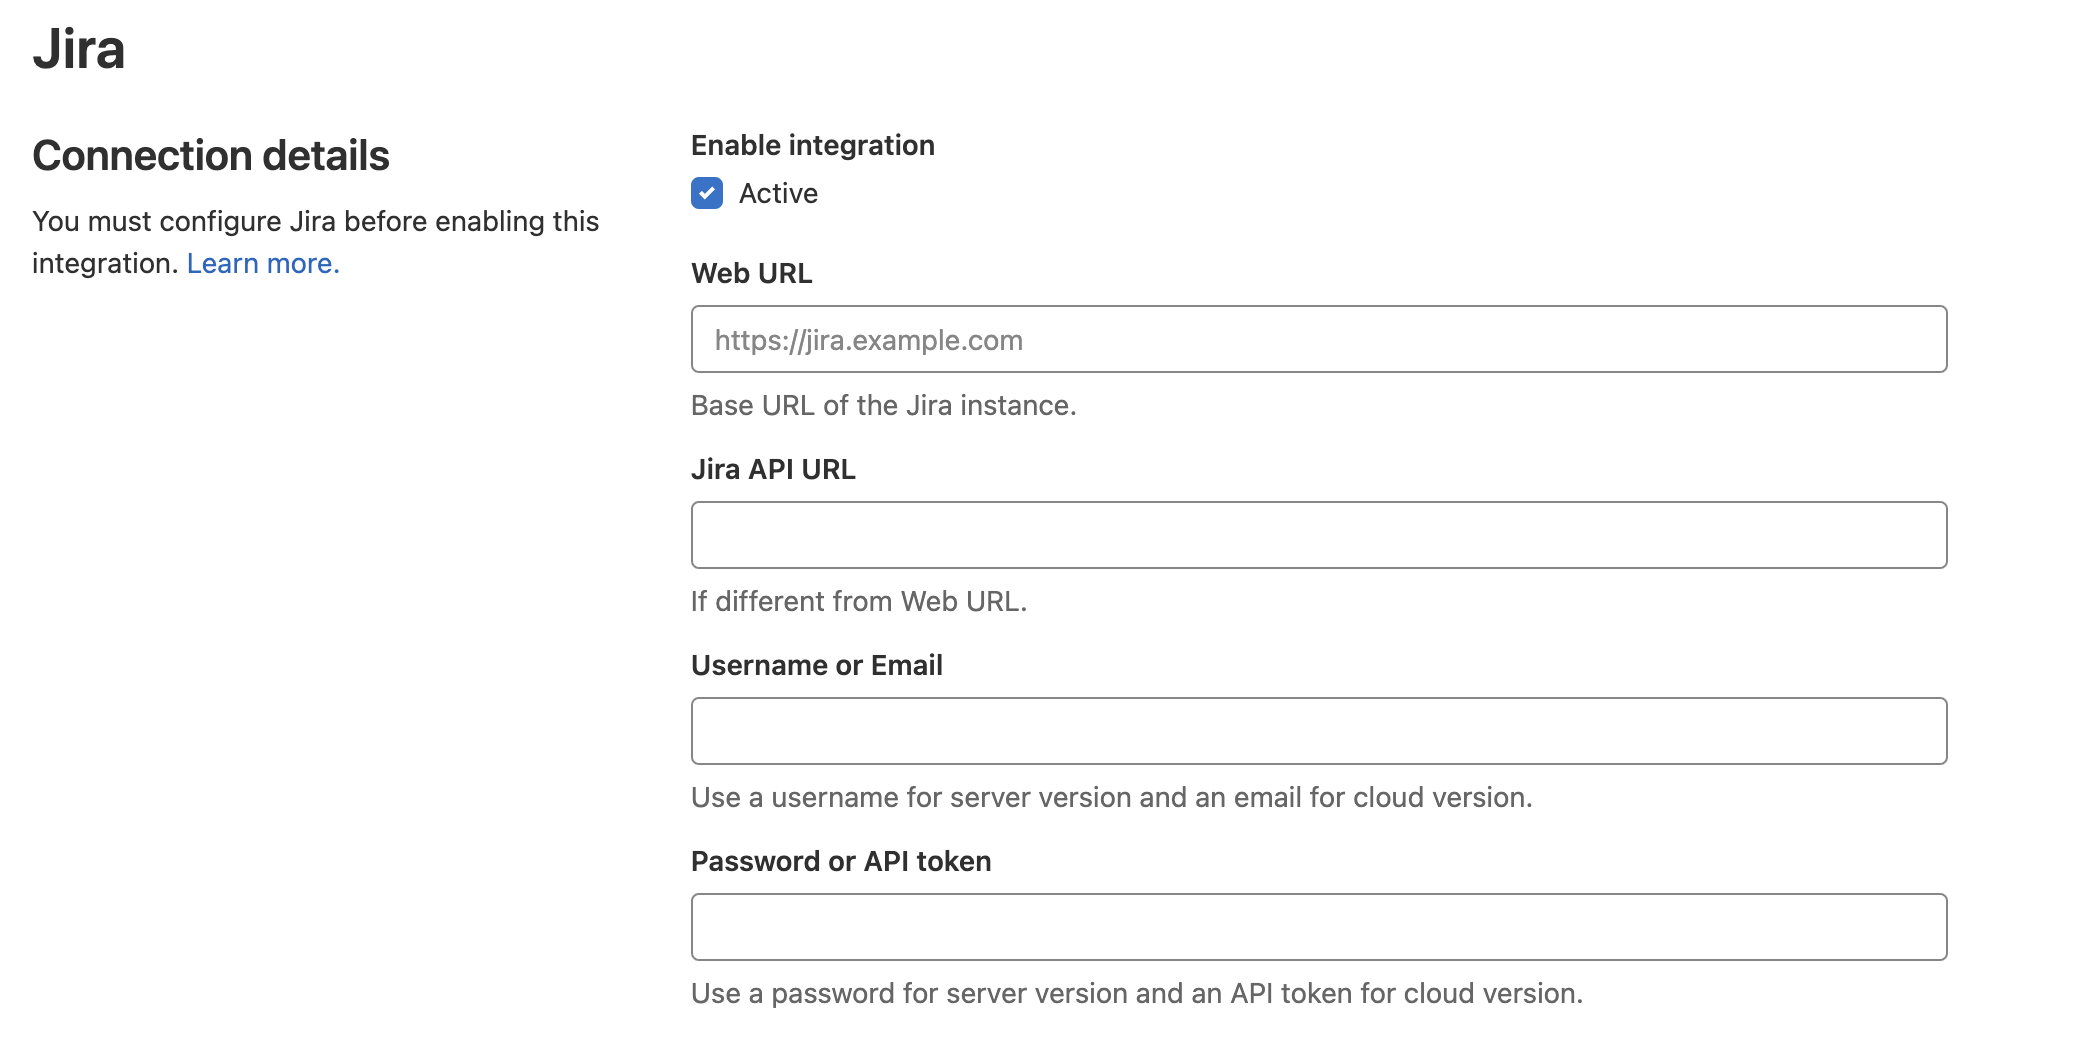
It’s pretty clear what data is required here, but I will go through some moments.
- Web URL - this is just a URL of your Jira instance.
- Jira API URL - you can leave blank if it’s the same as the Web URL.
- Username or Email - This is information about the user which will be used to authorize. Use a username for the server version and an email for the cloud version of Jira.
Do not use any personal emails/usernames for integrations because:
- If someone leaves the organization that he doesn’t have an integration set directly to his email and you will not lose access.
- This account will be used for all messages from GitLab in Jira issues, so it will be nice to see the message in Jira from “Project_name_integration” rather than from “John Doe”.
Trigger settings #
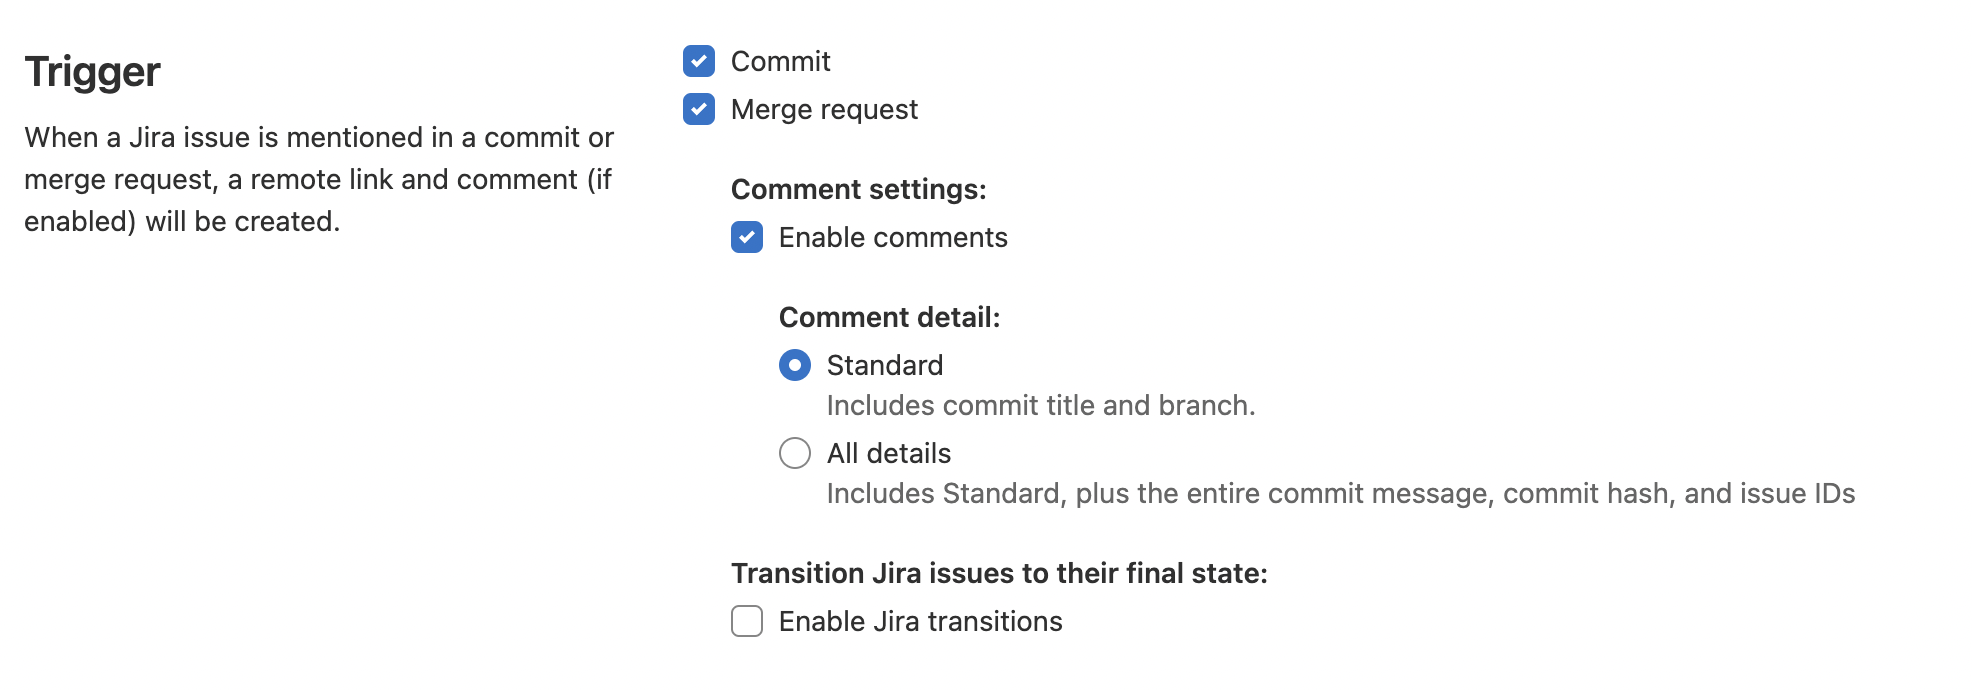
When a Jira issue is mentioned in a commit or Merge Request, a remote link and comment (if enabled) will be created. Usually, I follow the standard settings that are set by default.
And just click the “Save” button. That’s all. You created your GitLab-Jira integration.
We are ready to provide expert's help with your product
or build a new one from scratch for you!